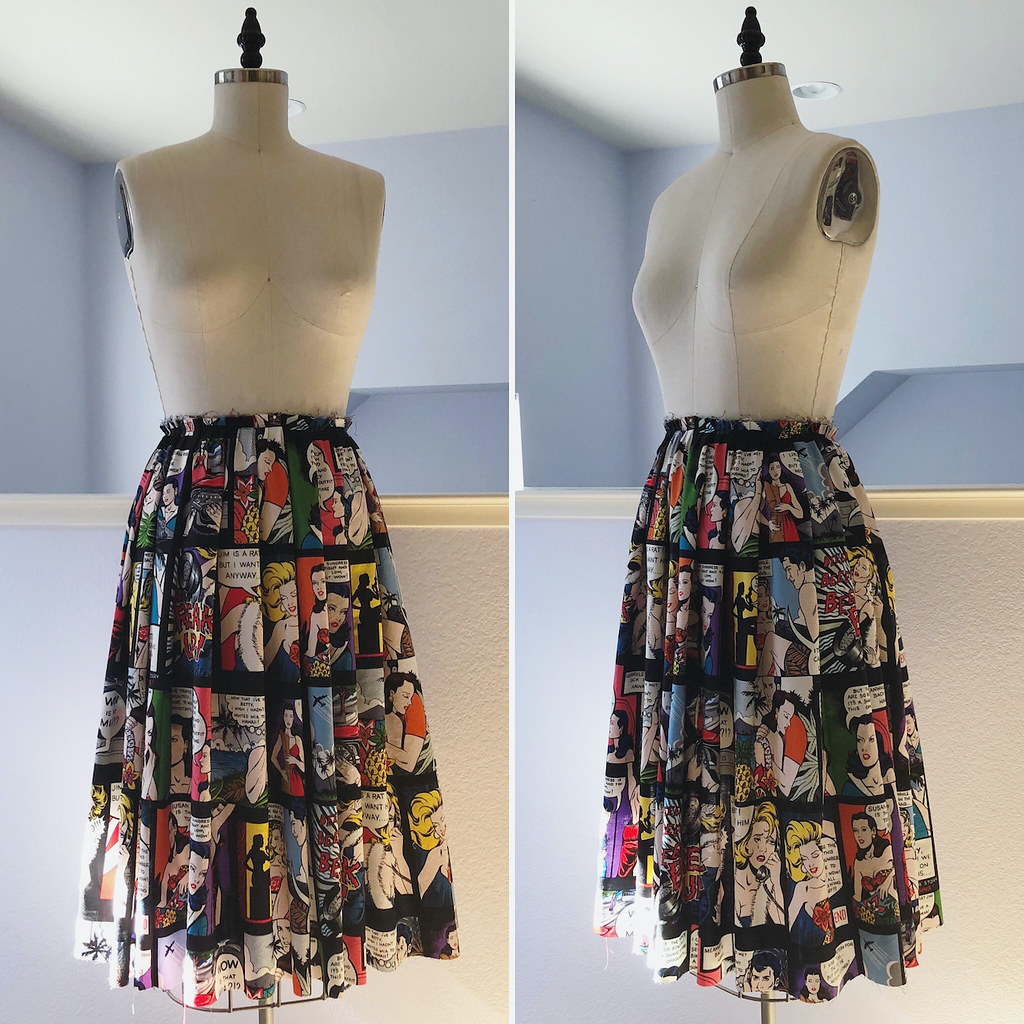
A couple of weeks back, I was rummaging through some of the fabric stash and I came across this quilting cotton. While it's not exactly Halloween themed, it is very over-the-top, and I thought it would be fun to make myself another brightly colored dress for October since last year's bright green Peanuts themed frock was so much fun to make and wear. Of course, with a print that is directional, there are limitations. I decided that a shaped skirt was going to be too much of a pain, and that the very linear print would never look right if the majority of the print was not facing right side up! Which leaves pleating, or a straight skirt. Well, I had a little over four yards to work with, and a full skirt is so much more fun than a pencil skirt, so my choice was quite easy.
A couple of years ago I found a Singer Featherweight at an estate sale. It was a good deal, and I couldn't resist taking her home with me. She came with a few feet, one of which was a ruffler. I have been haunted by the attachment ever since. I couldn't wait to try it out, but no project seemed quite right. Sure, I have gathered a few pieces of fabric here and there, but how would I figure out what settings to use to make it match another piece of fabric of determinate size? Well, here was the perfect opportunity, so I finally took the plunge!
There are a number of online videos that show how this attachment works; the Featherweight manual also has directions. But there is no substitute for actually putting a strip of fabric underneath the foot and playing around with stitch length, and all those wonderful adjustable doohickies on the ruffler itself.
Of course, I needed to do a few calculations to figure out how I would get three widths of 42" wide fabric to match the waistline on the bodice. I knew that a simple knife pleat would only eat up a third of the fabric, which would not be enough. So I tried a few things, and in the end, decided to use the ruffler to tuck every twelve stitches at a very small stitch length. This ate up a bit of the fabric width. Next, I would pleat the fabric using those tucks as a guide. Once I messed around with numbers on a piece of paper, I tested it out on some scrap fabric. And it worked quite well.
I originally thought that I would use four panels of full width fabric. I'm not entirely sure what I was thinking, but thankfully, as I was measuring out repeats and seeing what would be left for my bodice and sleeves, I realized there would not be enough yardage. A full skirt is fabulous, but a hem circumference of 160" is a little extreme, even for me. I went back to the drawing board and quickly realized that three panels would be plenty, I just had to refigure the pleats.
The most challenging part was deciding where to make those cuts in the fabric. In the end, I went with three matching panels. Thankfully, that would leave enough fabric for the bodice and sleeves to fit, and I would have three separate pieces of fabric to play with pattern placement on the top half of the dress.
After I had the three panels cut out, it was time to pleat the top edges. I decided that I would use the ruffler before stitching any side seams together to give myself some wiggle room. I was also not sure if the foot would play nicely with seam allowances.
The machine and the ruffler worked perfectly with my fabric on the first go. Thank you, vintage machinery, for being so reliable.
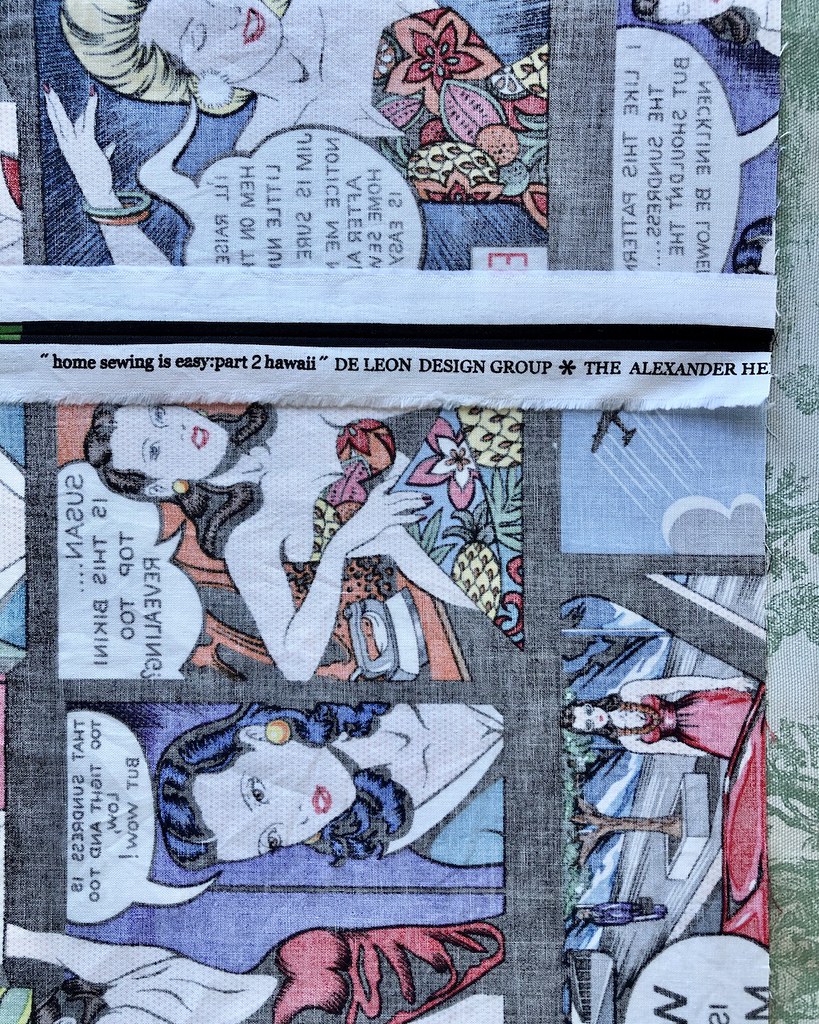
Next, it was time to stitch up the side seams. I almost always cut away any selvedge because it rarely lays flat. This particular cotton selvedge wasn't too tight or loose. Having recently come across a few images of vintage Alfred Shaheen dresses, it reminded me of the fact that selvedge edges with print titles are often included in his finished garments.
This fabric is most definitely Hawaiian inspired, which reminded me of the trend, and my skirt seam allowances now include the title of this fabric: "Home Sewing is Easy: Part 2 Hawaii." It's a fabulous Roy Lichtenstein/Pop Art inspired print from Alexander Henry Fabrics. I now NEED the first of the series as well, of course.
But back to pleating the already ruffled/pleated fabric.
It may not be the most accurate of knife pleated skirts in the world, but it looks pretty good, and all of those lovely frames of comic brilliance are intact. Which is a win in my book! And confirmation that home sewing is easy (at least most of the time)!!


Skirt envy, and I'm a guy.
ReplyDeleteNot that I'm counting, but between the Bernina, the seemingly never acknowledged Mrs. White (whereabouts never really confirmed), a serger, and now a Featherweight(!), you are starting to mirror a certain Manhattan sewist (no name, no name).
Would you consider constructing an oversized camp shirt with a comic panel as the pocket? Camp shirts are a breeze, any difficulties can be referred to the same Manhattan sewist.
Of pleats and gathers...you've outdone yourself again.
Great skirt!
ReplyDeleteTu falda queda preciosa y qué bonita máquina antigua de coser.
ReplyDeleteBESICOS.