Here is a sneak peek of my new coat!
There were a few moments at the sewing machine when I was
lamenting the thickness of my wool, but I persevered and am extremely pleased with finished
product. It may not be the most
practical garment I have ever made, but I have a feeling I am going to get a
lot of wear out of it despite the fact that my new winter coat has a wide open
neckline. Scarf time!
The most tedious part of the construction was
catch-stitching all those seam edges to the flannel underlining. But I got into a rhythm and ended up enjoying
the process. Where it was necessary to
press both seams in the same direction I made sure to trim and graduate the
covered seam, and then catch-stitch the top seam to my flannel. Don’t get me wrong, there is still a bit of
bulk there, but it is much more manageable.
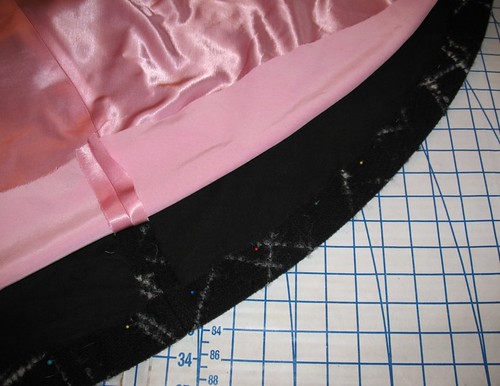
Thankfully, the edges of the wool did not fray terribly. My rayon satin, however, was not quite as easy
to work with. I was concerned that the
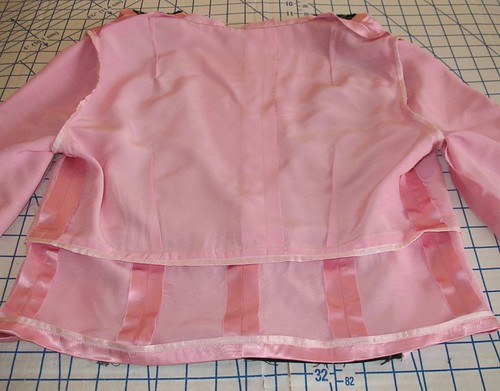
seams that get more stress than others might continue to fray, so I covered
them with Hug Snug rayon seam binding (yes, I really am obsessed with this
stuff).
I trimmed the armhole seams and covered them, along with the horizontal seams above and below the
waistline. The seam binding also came in
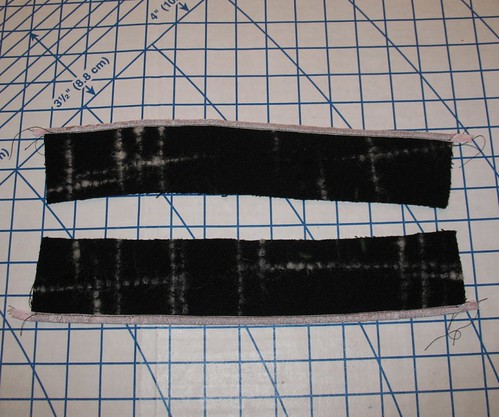
handy for my sleeve facing – instead of having to fold the wool and adding
thickness, I just bound the raw edge.
I realized early on that gathering wool coating underlined
with cotton flannel was going to be almost impossible – silk thread or not,
this fabric is too thick for a simple basted stitch! To avoid tears and
frustration, I used a technique that I came across many years ago. I believe I first saw the tip on a pattern
instruction sheet. They suggested using
dental floss!? to gather thick or unruly material.
Well, the idea of dental floss living inside my garment freaked me out a bit, however, I always have crochet thread on hand and I thought it would make an
excellent substitute. Turns out it does.
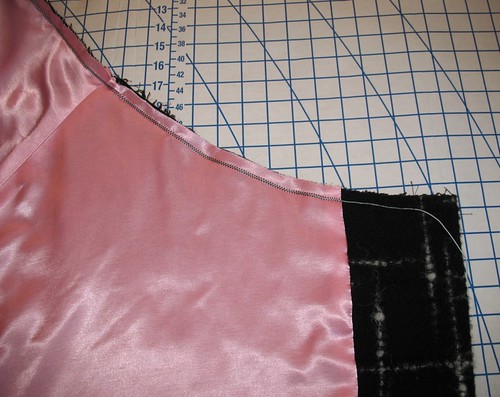
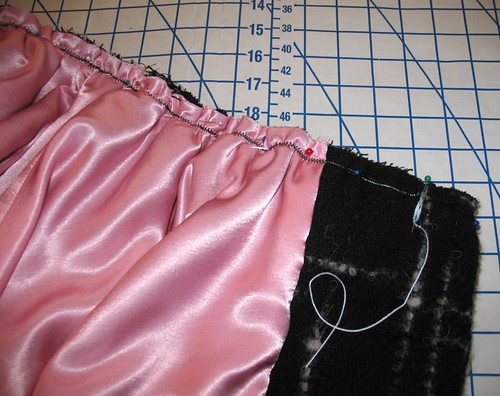
The
trick is to zig-zag over the crochet thread/floss without catching it. The crochet thread is then pulled up and,
unlike sewing thread, will not break under pressure. It works beautifully!
(And I will let you in on a little secret –
if you happen to catch your crochet thread up in the zig-zag stiches, just use
a seam ripper to remove the offending stitch – unless you have to remove quite
a few bits of the stitching in a concentrated area it will not affect the
gathering at all.)
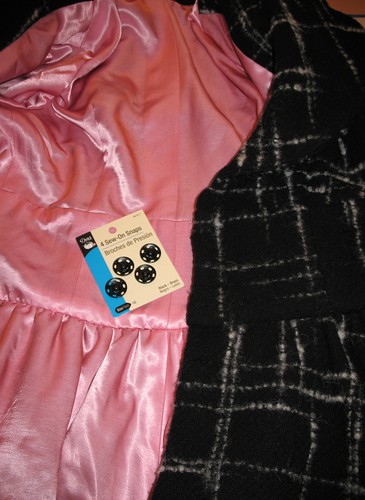
This coat uses snaps as a fastening. And while it is somewhat thrilling to start a
project that requires no buttonholes or zippers of any kind, I was not
convinced that snaps could close such a heavy coat. Off to my local JoAnn Fabrics I went, and
purchased some size 10 snaps which are just a skosh under 1” in diameter. A larger size was available, but they looked ridiculously large and scary - like once you get them snapped you can never get them apart, so I decided that the size 10's would have to be sufficient.
I am happy to report that three of these
babies easily keep the coat shut. I
ended up covering my snaps with some bemberg scraps that I had on hand using
this Threads tutorial because the black paint was already chipping away after unsnapping them from the card they came on. The rayon is probably too delicate for this
task and may not hold up very well, but for now, it works just fine.
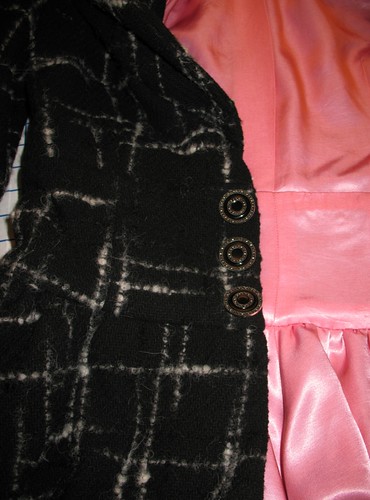
The buttons I decided on have a bit of a shank, and I probably should
have used something that was a bit more flat because they are sitting on top of
the coat instead of sliding through a buttonhole and holding fabric in place. Live and learn, right? And I can always swap them out for something
different if I find something that will work better!
I ended up adding cuffs to my coat. Because the cuffs were drafted with the
three-quarter length in mind, I had to take about 1” out of the width of the
pattern piece.
I underlined the cuffs with
cotton to substitute as interfacing. As
it was, the two layers of wool, plus flannel, plus cotton, plus lining, plus
small wrist circumference was a bit of a bother to get under the sewing
machine, but I prevailed. Hand basting
is miraculous!
The lining was bagged. The directions suggested finishing the lining separate from the coat but I think sewing the lining to the coat gives a much nicer finish - and it is an excuse for more hand sewing with silk thread!
And now my arms need a good rest from hoisting this thing up
onto the sewing table and to the ironing board, and back to the sewing machine,
and back to the couch for some hand sewing.
It doesn’t feel heavy when being worn, but boy was it obvious during
construction. I have some pink wool
yardage that I hope to make into a coat before the cold season ends this year,
but I think I am going to take a break from thick wool for the moment!
So that about covers the construction of this thing. And as soon as I sort through them, I will
post pictures of the finished product on a body!








This looks beautifully luxurious. I was wondering how the gathers would look in a heavy fabric but you handled them perfectly and the drape is lovely. It must feel wonderful to wear.
ReplyDeleteBeautiful coat!
ReplyDeleteLooks beautiful! I love the look of the fabric you used :)
ReplyDeleteAre you really just one person?
ReplyDeleteThis coat is impeccable.
Sign me,
Beyond impressed
Wonderful coat and delightful post. You deserve to be proud.
ReplyDeleteIt's such a treat to read along an see how you've contructed this lovely coat. It is just gorgeous! Enjoy wearing it, i am sure it looks splendid on you.
ReplyDeleteYou are complexly amazing! Way to go, Laura Mae!
ReplyDeleteooohhhh....it looks great!
ReplyDeleteExcellent post -- so many great tips. Can't wait to see you model the finished garment!
ReplyDeleteThe coat looks amazing, Laura Mae! Can we see a photo of it being worn?
ReplyDeleteI can understand your love affair with seam binding. I've not used it (and not noticed it in my local haberdashery) but I have had a lot of fun in recent times cutting bias strips for hong kong finishes. When only a relatively small amount is required, I have called upon remnants of favourite fabrics from my scrap stash (If you guessed I have a problem with getting rid of fabric, even tiny amounts, then you would be right on the money!) While often not seen, or only glimpsed on the inside of an unlined jacket, I get quite a kick out of it.
It's beautiful! You make it look so easy and achievable. I just might have to try it out.
ReplyDeleteI must say, you do have a talent in sewing and dressmaking! This coat of yours looks fabulous and chic! And I do like the fabric that you used. The deconstructed design of the pattern gives the coat an interesting look. I hope you continue to make more of this in the future!
ReplyDelete